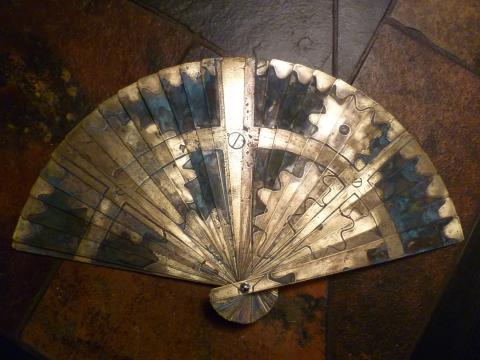
As part of vixy's costume for SteamCon this year, she needed a steampunk Asian-style fan. After some brainstorming, we decided to make one out of brass sheet, with a design etched on the front. This wouldn't be radically different from several other projects, though with 28 individual blades it would still be a significant amount of work.
The design itself was also a challenge, as it needed to be properly tiled across the blades. After some consultation on planetary gear systems, vixy drew it up in Photoshop and then cut it up into different layers using a template we worked out. In the end I was given a series of etching masks and set to work.
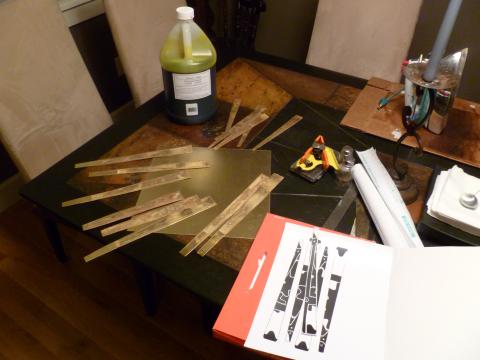
As previously mentioned, I first attempted the etching using a new (to me) galvanic process. The results were slow and uneven, and I was blowing through fuses on my power supply at an alarming rate. I finally gave up roughly halfway through and bought a large quantity of ferric chloride from VetCo. The rest of the etching was finished in a single night, thanks to the power of parallelism. Each blade was placed in a ziplock bag with a healthy does of ferric chloride and sealed up. All of these were then placed in a large plastic storage box. This contained the inevitable leaks, and also allowed me to gently agitate all of them at once through the simple expedient of holding it in my lap and bouncing my knees while watching a movie.
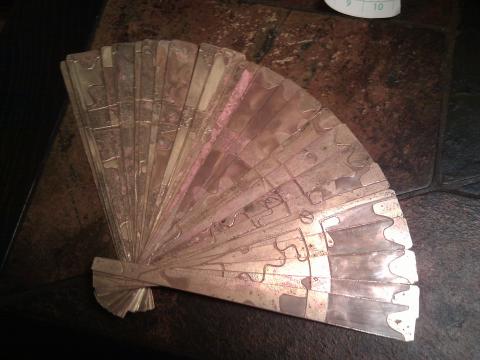
The results, once cut out, were pretty nice. This was the version shown at SteamCon, in fact, due to simply running out of time. But the etched pattern didn't really pop, and the folding/unfolding action was very stiff. The blades are threaded together with monofilament (see below), this is what lets you open the blades to the correct position. Unfortunately, the monofilament I had on hand turned out to be much thicker than I had realized. Not only did this make the action very clumsy, it also added a lot of fatigue on the monofilament and it started breaking within hours.
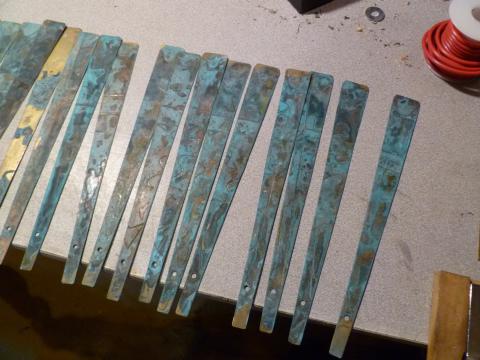
To fix the breaking problem, I bought much lighter, 4# monofilament. I also drilled a second line of holes in the blades, to add redundancy. Now it can break once in any place and still work.
To fix the pattern visibility, I needed to add a patina. I had attempted this originally using the same ammonia vapor technique that had worked well in the past. Those had all been on much smaller surface areas, however. Trying to do it on even half of the blades at once was painfully slow. After a pause of several weeks, I returned to the problem and decided to try using salt water, which I had read about as a way to improve the reaction. And it did! I made up a batch of saline (1 cup water, 2 tablespoons salt) and dabbed it onto the blades with a paper towel. These were suspended over an ammonia bath inside the same cheap plastic storage container used earlier. It only took about 30 minutes to get a very good patina on each blade. I had to come out every 15 minutes or so to reapply the salt water. Some blades too a lot longer, but as I was running them through in batches it still only took a couple of hours to get them all done.
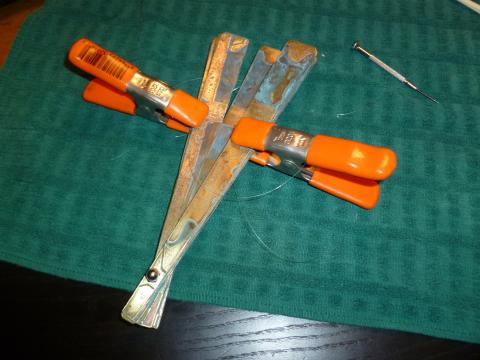
The blades were then lightly sanded to remove the patine on the raised (unetched) sections of the design. They were bolted back onto the central pivot, and I faced the task of threading them all together. This was very difficult when threading the single line of thicker monofilament. Now that I was running two lines of much thinner monofilament, it was almost impossible to get the tensioning correct, leading to inappropriate spacing between blades when the fan was opened up. After some frustrating failures, I finally tried clamping the blades in place while working on it. Success! This prevented the tensioning on already threaded sections from coming loose, and it also made the entire this much easier to manage while working on it. It still took about two hours, but the result is quite satisfactory.
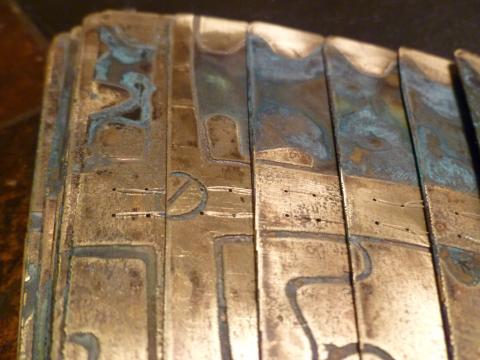
The original plans for this fan included wood slats on either end and a spring-loaded release mechanism. Those are now indefinitely on hold, as it has already taken far longer than planned, and the shear mass of that much brass is greater than expected. It's a fairly hefty artifact already, and adding to that seems unwise. Also, I'm very unsure making it spring-loaded is a good idea. The last thing I want to do is to break the monofilament and have to rethread it again. So for now, the etched brass fan is finished. Look for it next time vixy has an excuse to get dressed up!
That's a lovely aqua colour in the patina - quite pretty! Nicely done.
ReplyDeleteReally, I want to sharpen the edges now, but that's just the assassin in me talking. XD
Do you take commissions?
ReplyDeleteI do sometimes, when I have a hole in my schedule, but the amount of labor required makes the cost pretty prohibitive.
ReplyDeletethis looks amazing! I am a cosplayer also in Seattle, very close to Fremont area. Nice to see people with similar interests + advance technical skills! I found your site because I was looking up Asian inspired steampunk inspiration. keep up the good work.
ReplyDeletehttp://www.seattlecosplay.com/
How much would one of those fans be if one was commissioned
ReplyDelete